Playwright: Speed, Reliability, and Simplicity in Web Automation
When it comes to testing modern web applications, speed and reliability matter. Playwright is a powerful tool developed by Microsoft that helps you automate your browser testing across multiple browsers—Chrome, Firefox, and Safari—with just one framework.
In this blog, I’ll walk you through what Playwright is, why it’s useful, and how to create your first test script using Playwright in a few simple steps. Let’s dive in!
What is Playwright?
Playwright is a Node.js-based framework for automated UI testing. It allows you to:
- Test web applications across different browsers.
- Emulate genuine user behavior, including clicks, keystrokes, scrolling, and form submissions.
- Take screenshots, record videos, and trace test steps.
- Test in headless or headed mode (with or without a visible browser window).
Why Choose Playwright for Test Automation?
Playwright stands out as a powerful end-to-end testing framework that brings speed, stability, and smart features to the table. Here’s why developers and QA engineers love it:
- Test Across All Major Browsers: Write your test once and run it on Chromium (Chrome/Edge), Firefox, and WebKit (Safari) — all with built-in support.
- No More Manual Waits: Playwright automatically waits for elements to load or become ready. This means fewer flaky tests and less need to write wait or sleep statements.
- Easily Handle Multiple Tabs and Windows: Need to automate workflows that involve new tabs, popups, or file downloads? Playwright makes it smooth and simple.
- Smart and Flexible Locators: Use modern locator strategies like
getByRole,getByText, orgetByPlaceholderto find elements in a reliable and readable way. - Run Headless or with UI: Speed up testing in headless mode, or run with UI (headful mode) when debugging or presenting.
- Built-in Test Reporting: Playwright can generate HTML reports automatically and even open them after your test run — perfect for reviewing results visually.
- API Mocking and Network Control: Intercept and mock API responses directly within your tests. This helps you test frontend features even if the backend isn’t ready.
- Capture Screenshots and Videos: Playwright can record your tests or take screenshots during execution — a great way to debug failed tests or create test evidence.
- Fast Parallel Execution: Run multiple tests in parallel, saving time during large test suites — especially in CI/CD pipelines.
- Cross-Platform Support: It works seamlessly on Windows, macOS, and Linux, making it a flexible choice for all teams.
- Supports Modern JavaScript and TypeScript: Playwright is built for today’s stack — with excellent support for JavaScript and TypeScript, making it developer-friendly.
- Built-in Test Recorder: Use Playwright’s code generator to record actions and get instant code. This helps you quickly build your first test without writing everything manually.
How to Identify Locators for Your Web Application?
Here’s a simple 3-step method using Chrome DevTools and Playwright’s features.
Step 1: Use Chrome DevTools to Inspect Elements
- Open your web application in Google Chrome.
- Right-click on the element you want to automate (like a button or input field).
- Click Inspect — this opens DevTools, and highlights the element in HTML.
- Look for unique attributes:
id(Best!)nameplaceholdertext(for buttons or links)class(be careful with dynamic class names)
Step 2: Use the Best Locator Strategy in Playwright
Here’s how Playwright recommends selecting elements:
| Element Type | Preferred Locator | Playwright Code Example |
|---|---|---|
| Input with id | #id |
page.fill('#email', 'abc@example.com') |
| Button with text | text="..." |
page.click('text="Login"') |
| Input with placeholder | input[placeholder="..."] |
page.fill('input[placeholder="Password"]', '123') |
| Using role | getByRole() |
page.getByRole('button', { name: 'Submit' }) |
| Custom attribute | [data-testid="..."] |
page.click('[data-testid="login-button"]') |
Use data-testid or unique IDs if you can modify the app (super clean and stable for testing).
Step 3: Use Playwright Codegen (Auto-generates Locators!)
Playwright can watch your browser interactions and generate code. Run this in terminal:
npx playwright codegen https://your-app-url.com
Then it will:
- Launch a browser
- Watch your clicks, typing, etc.
- Generate Playwright test code in real time (with locators!)
Best Practices for Locators
Use:
id,name, ordata-testidattributes- Text content for buttons and links
- Stable and readable selectors
Avoid:
- Complex or deep
xpath - Random or dynamic class names (like
class="x4qs37a")
Now let’s start with Installation
Let’s set up an environment for the Playwright project.
Step 1: Install Node.js (if not already)
Step 2: Create a New Project Folder
- Open VS Code
- Click File → Open Folder… and create a folder named
playwright-login-test - Open a terminal inside VS Code: Ctrl + backtick(`)
Step 3: Initialize npm and Install Playwright
npm init –y
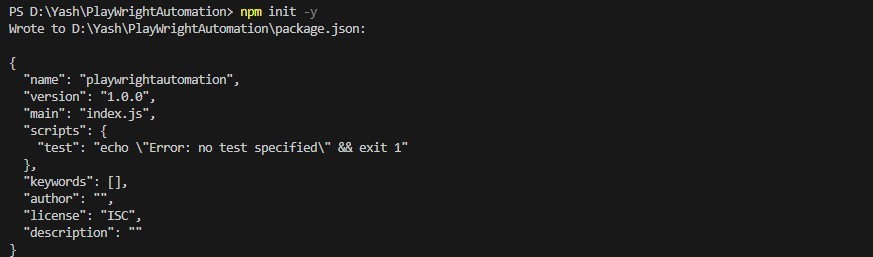
npx playwright install
npm install -D @playwright/test

This sets up package.json, installs Playwright, and downloads the browsers.
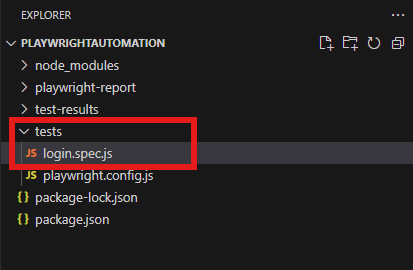
Step 4: Create Your First Login Test
- Create a folder named
tests - Inside that, create a file named
login.spec.js
Login.spec.js File
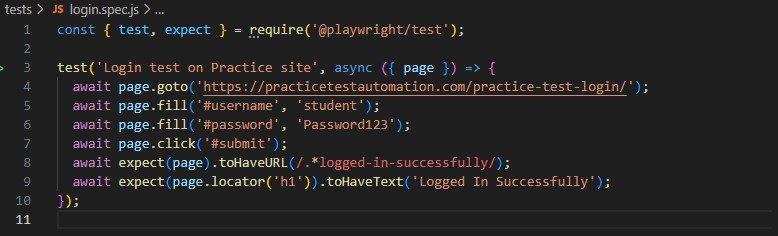
Let’s break down the code step by step. This is a simple Playwright test written in JavaScript, where we’re testing a login page.
1. Importing test and expect from Playwright
const { test, expect } = require('@playwright/test');
require('@playwright/test'): This imports Playwright’s testing API.test: This is the function used to define a single test case.expect: This is the assertion library that lets you make expectations (checks) in your tests, like verifying that something is true.
2. Define the Test Case
test('basic login test', async ({ page }) => { ... });
- This defines a test case with the name “basic login test”.
- The second argument is an asynchronous function that will contain the test steps. Playwright tests are often asynchronous because they involve waiting for browser actions to complete.
{ page }: This is the default Playwright context for interacting with the web page. Playwright gives this as part of the test function, and it’s used to interact with the page.
3. Opening the Web Page
await page.goto('https://practicetestautomation.com/practice-test-login/');
await page.goto(url): This command tells Playwright to navigate the browser to the specified URL.urlis the link to the login page (https://practicetestautomation.com/practice-test-login/).- The
awaitkeyword makes sure the script waits for the page to fully load before continuing to the next line.
4. Fill in the Username
await page.fill('#username', 'student');
- This is used to fill in an input field.
#usernameis the CSS selector for the username field on the page (it targets an element with theid="username").'student'is the text value being typed into the input field.
5. Fill in the Password
await page.fill('#password', 'Password123');
- Similar to the previous step, this command fills in the password input field (
#password) with the value'Password123'.
6. Click the Submit Button
await page.click('#submit');
- This instructs Playwright to click an element on the page.
#submittargets the button element (using itsid="submit").- The test simulates the user clicking the “Submit” button after entering credentials.
7. Verify the URL After Login
await expect(page).toHaveURL(/.*logged-in-successfully/);
await expect(page): This is an assertion to verify something about the page object.toHaveURL(url): This checks whether the current URL of the page matches the expected pattern.- Here,
/.*logged-in-successfully/is a regular expression pattern. It checks if the URL contains the string “logged-in-successfully”. - If the URL matches the pattern, the test passes. If it doesn’t, the test fails.
Full Summary of What This Code Does:
- It opens a login page.
- It fills in the username and password fields.
- It clicks the “Submit” button.
- It checks whether the page URL contains “logged-in-successfully”, indicating that the login was successful.
If any of these steps fail (like the page doesn’t load or the login fails), Playwright will throw an error, and the test will fail.
Step 5: Run the Test
npx playwright test

Step 6: Generate and View the HTML Report
npx playwright show-report
This command should open your test report in the default browser.

If you want to always generate a report, you can edit or create playwright.config.js like this:

Then run:
npx playwright testnpx playwright show-report
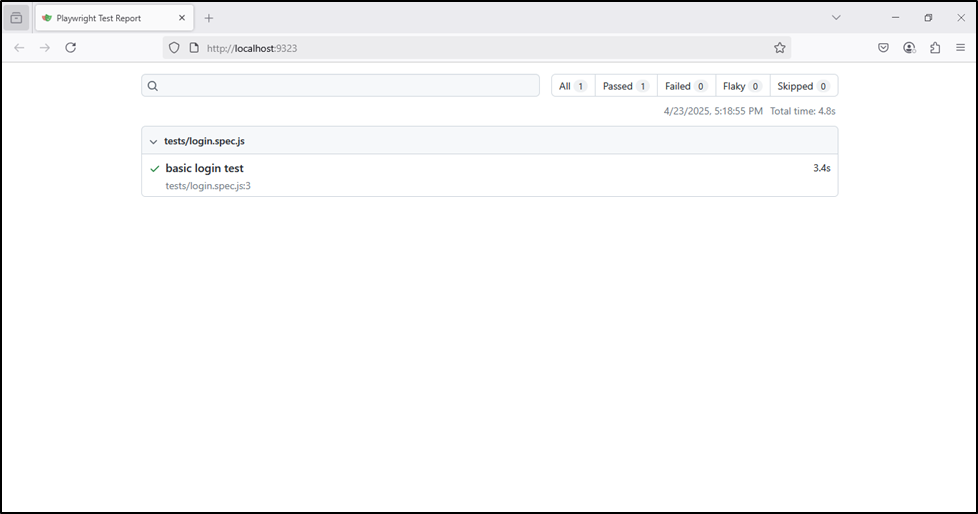
As per below image you can see report is open in browser.
Wrapping Up
Playwright truly transforms the way we approach web automation. Whether you’re testing a modern React application, a shopping website, or a simple login feature — it brings speed, reliability, and simplicity to your testing workflow.