
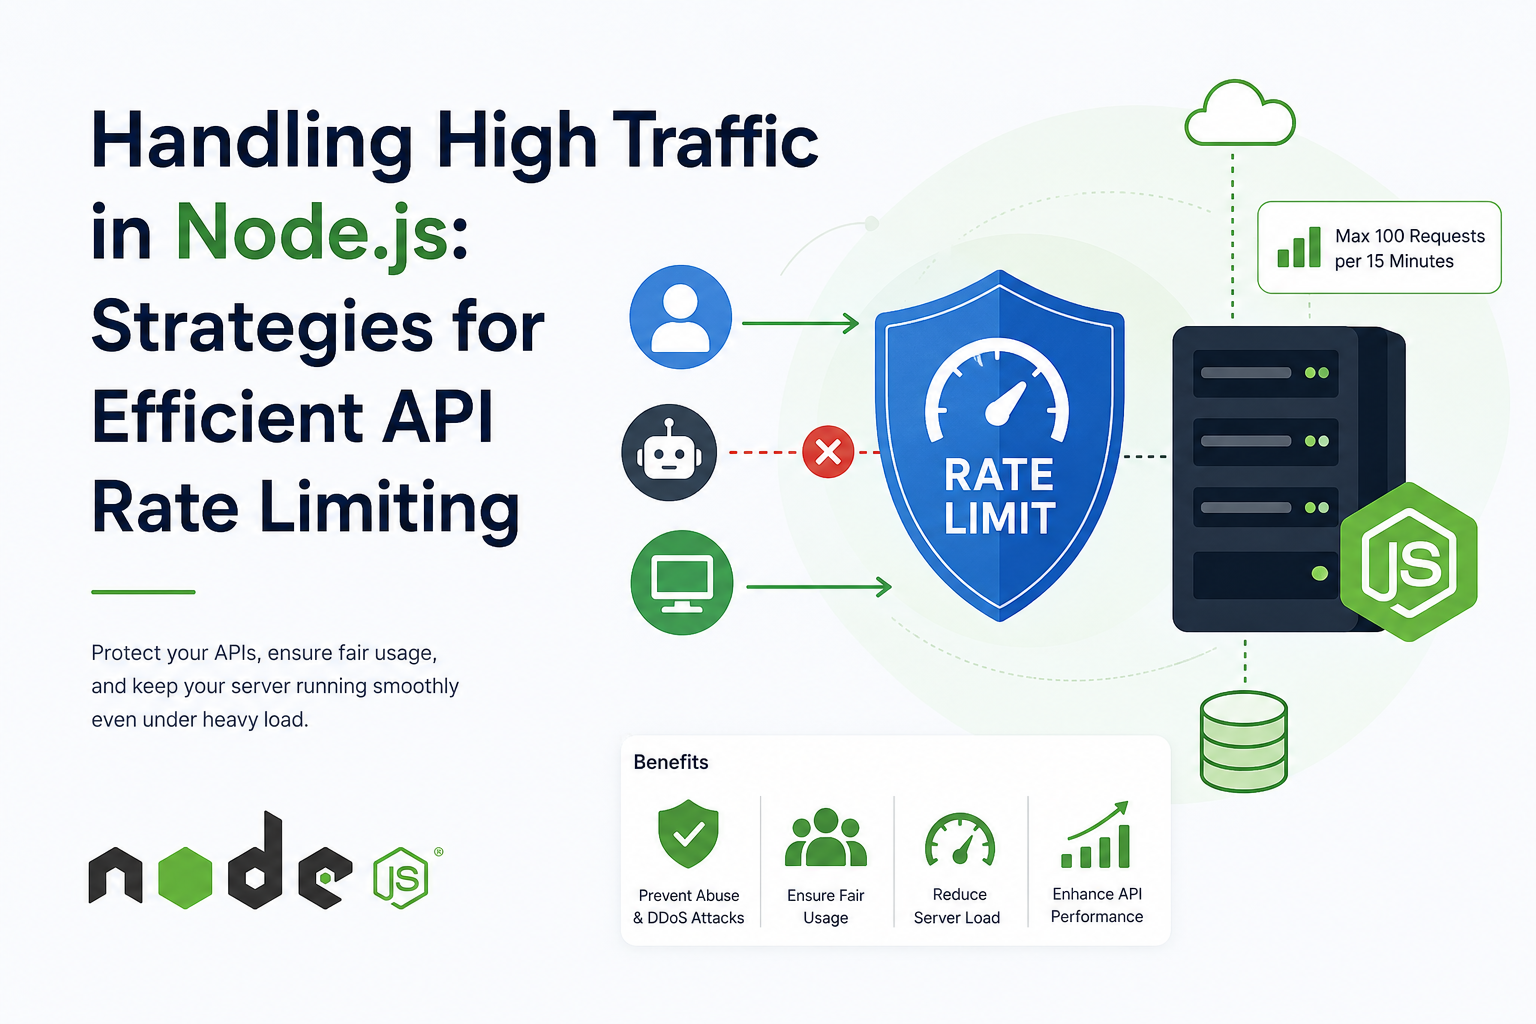
APIs play a vital role in modern web applications, but with great power comes great responsibility. One key aspect of maintaining API performance, security, and scalability is implementing rate limiting. This strategy controls the number of requests a client can make to the API within a defined period, ensuring that the system remains stable even under heavy load.
In this article, we’ll dive into advanced techniques and best practices for implementing rate limiting in a Node.js application using popular tools and frameworks.
What is rate limiting?
Rate limiting is a technique used to control the amount of incoming or outgoing traffic within a network. In this context, a network refers to the line of communication between a client (e.g., a web browser) and our server (e.g., an API).
This technique helps regulate user requests based on certain constraints, ensuring that:
- Data flows smoothly without congestion
- The risk of attacks is minimized, improving security
- The server remains stable and isn’t overwhelmed
- Users can only access resources within the limits set by the developer
For instance, we may want to limit the number of requests an unsubscribed user can make to a public API to 1,000 requests per month. Once that limit is exceeded, any further requests would be ignored, and an error message would notify the user that they’ve surpassed the limit.
For effective rate limiting, there must be a clearly defined constraint or limit, which could be based on any of the following:
- Users: The limit applies to a specific user, identified by a unique user ID.
- Location: The limit is based on the geographic location of the request.
- IP Addresses: The limit is applied based on the IP address of the device making the request.
Why Rate Limiting Matters ?
Rate limiting protects your API from abuse, DoS attacks, and accidental overuse by:
- Preventing Abuse & DDoS Attacks: Restricts excessive requests from a single source.
- Ensuring Fair Usage: Distributes server resources among multiple users.
- Reducing Server Load: Prevents excessive requests from overloading the system.
- Enhancing API Performance: Improves response times by controlling the request flow.
Let’s dive into advanced approaches to implement it effectively in Node.js.
Example
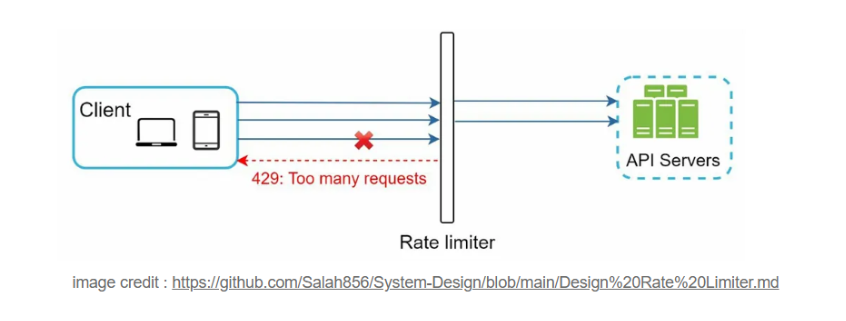
1.Imagine one day your application experiences a sudden surge in traffic, instead of real users, it’s coming from bots attempting a DDoS attack. Without rate limiting in place, your server could become overwhelmed and crash, making your service unavailable.
2.Let’s say you’ve created a public API and want users to try it before making a purchase. You decide to offer 10 free API calls so they can test it. To ensure users don’t abuse the free trial and to properly monetize your API, rate limiting is essential. Once the limit is reached, users will need to subscribe to continue using the service.
Implementing Rate Limiting in Node.js
Several libraries can help with rate limiting in Express.js and NestJS.
1. Using express-rate-limit (Fixed Window Strategy)
A simple way to apply rate limiting in an Express.js API:
const express = require('express');
const rateLimit = require('express-rate-limit');

const app = express();
const limiter = rateLimit({
  windowMs: 1 * 60 * 1000, // 1 minute
  max: 100, // Limit each IP to 100 requests per window
  message: 'Too many requests, please try again later.'
});

app.use('/api', limiter); // Apply rate limiting to API routes

app.listen(3000, () => console.log('Server running on port 3000'));
2. Using nestjs/throttler (Fixed Window in NestJS)
For a NestJS application, install nestjs/throttler:
npm install @nestjs/throttlerThen, configure it in your app.module.ts:
import { Module } from '@nestjs/common';
import { ThrottlerModule } from '@nestjs/throttler';

@Module({
  imports: [
    ThrottlerModule.forRoot({
      ttl: 60, // Time-to-live (seconds)
      limit: 100, // Max requests per time window
    }),
  ],
})
export class AppModule {}
Apply it to controllers:
import { Controller, Get } from '@nestjs/common';
import { Throttle } from '@nestjs/throttler';

@Controller('api')
export class ApiController {
  @Throttle(10, 60) // 10 requests per 60 seconds
  @Get()
  getData() {
    return { message: 'Data fetched successfully' };
  }
}
3. Using Redis for Distributed Rate Limiting
For high-traffic applications running on multiple instances, using Redis ensures consistent rate limiting across all instances.
Install Redis & ioredis
npm install ioredis express-rate-limit rate-limit-redisConfigure Redis Rate Limiter
const Redis = require('ioredis');
const rateLimit = require('express-rate-limit');
const RedisStore = require('rate-limit-redis');

const redisClient = new Redis();
const limiter = rateLimit({
  store: new RedisStore({
    sendCommand: (...args) => redisClient.call(...args),
  }),
  windowMs: 60 * 1000, // 1 minute
  max: 100, // 100 requests per minute
});

app.use('/api', limiter);
Why Redis?
- Works in distributed environments (multiple servers).
- Faster than in-memory storage for large-scale apps.
Types of Rate Limiting
- User-Based Rate Limiting – This restricts the number of API requests a specific user can make within a given timeframe. It ensures fair usage and prevents a single user from overloading the system.
- Concurrent-Based Rate Limiting – Controls how many simultaneous connections a user can have at any given moment. This is especially useful in mitigating DDoS attacks by preventing excessive parallel requests.
- Location/IP-Based Rate Limiting – Limits requests based on the user’s IP address or geographic location. This is useful for location-specific services or events, ensuring only users from a particular region can access the API at a controlled rate.
- Server-Based Rate Limiting – Applied at the server level to manage different types of services it offers. This helps distribute resources efficiently and prevents any single service from consuming excessive bandwidth or processing power.
Best Practices for High-Traffic APIs
- Use Redis for horizontal scaling: Ensures consistent rate limits across multiple servers.
- Implement IP & User-based limits: Prevents abuse from a single IP while allowing fair user access.
- Differentiate public & private APIs: Stricter limits for public APIs; relaxed for authenticated users.
- Monitor and log rate-limited requests: Use monitoring tools like Prometheus, Datadog, or New Relic.
- Allow premium users higher limits: Different tiers for free vs. paid users.
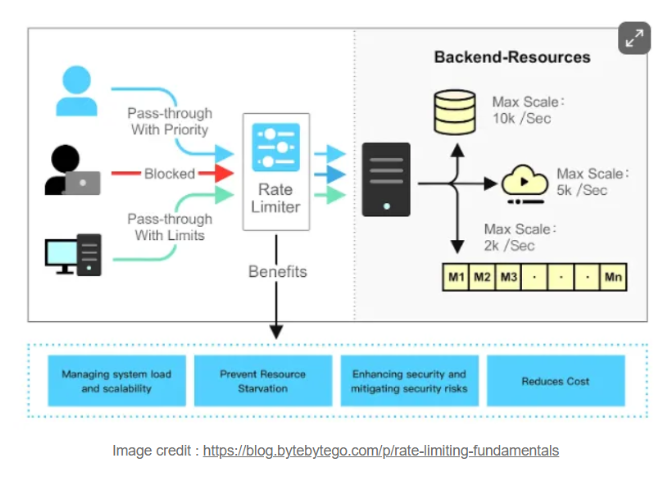
Benefits of Rate Limiting
Rate limiting plays a crucial role in modern large-scale applications. Here are some key benefits of using a rate limiter. While we’re focusing on API rate limiters, these advantages apply to other use cases as well.
Reduce cost
Rate limiting helps control costs by preventing excessive use of resources. When a system is flooded with requests, it may need extra computing power or bandwidth, leading to higher expenses.
It’s especially important for services that rely on paid third-party APIs, where each request comes at a cost. For example, APIs used for credit checks, payments, or retrieving health records often charge per request. By limiting the number of calls, businesses can manage expenses and avoid unnecessary charges
Real-World Applications Using Rate Limiting
Many well-known platforms use rate limiting to maintain stability, security, and fair usage. Here are some real-world examples:
- Twitter (X) – Restricts the number of tweets, DMs, and API requests per hour to prevent spam and server overload.
- GitHub – Limits API requests to prevent misuse and ensure fair access for all users.
- Google APIs (Maps, YouTube, etc.) – Enforces request quotas, requiring users to upgrade their plans for higher limits.
- OpenAI (ChatGPT API) – Caps the number of requests for free-tier users to manage server load and prevent excessive usage.
- Cloudflare – Uses rate limiting to protect websites from DDoS attacks and bot traffic.
- Stripe & PayPal – Restrict API calls per second to ensure secure and efficient payment processing.
- Slack – Controls API requests to prevent abuse and keep communication smooth across workspaces.
These companies rely on rate limiting to protect their systems, enhance performance, and maintain a reliable experience for all users.
Conclusion
Managing high traffic efficiently in Node.js requires a strong rate-limiting strategy. Using techniques like fixed/sliding windows, token buckets, Redis-based rate limiting, and adaptive throttling, you can prevent abuse, improve performance, and ensure a seamless experience for genuine users.